

* The following post describes steps we took to install an oven in our Sprinter. However, everyone should do their own research to ensure safety when installing an oven in a vehicle and we are not liable for any damage or injuries that may occur from utilizing information or copying ideas found in this post*
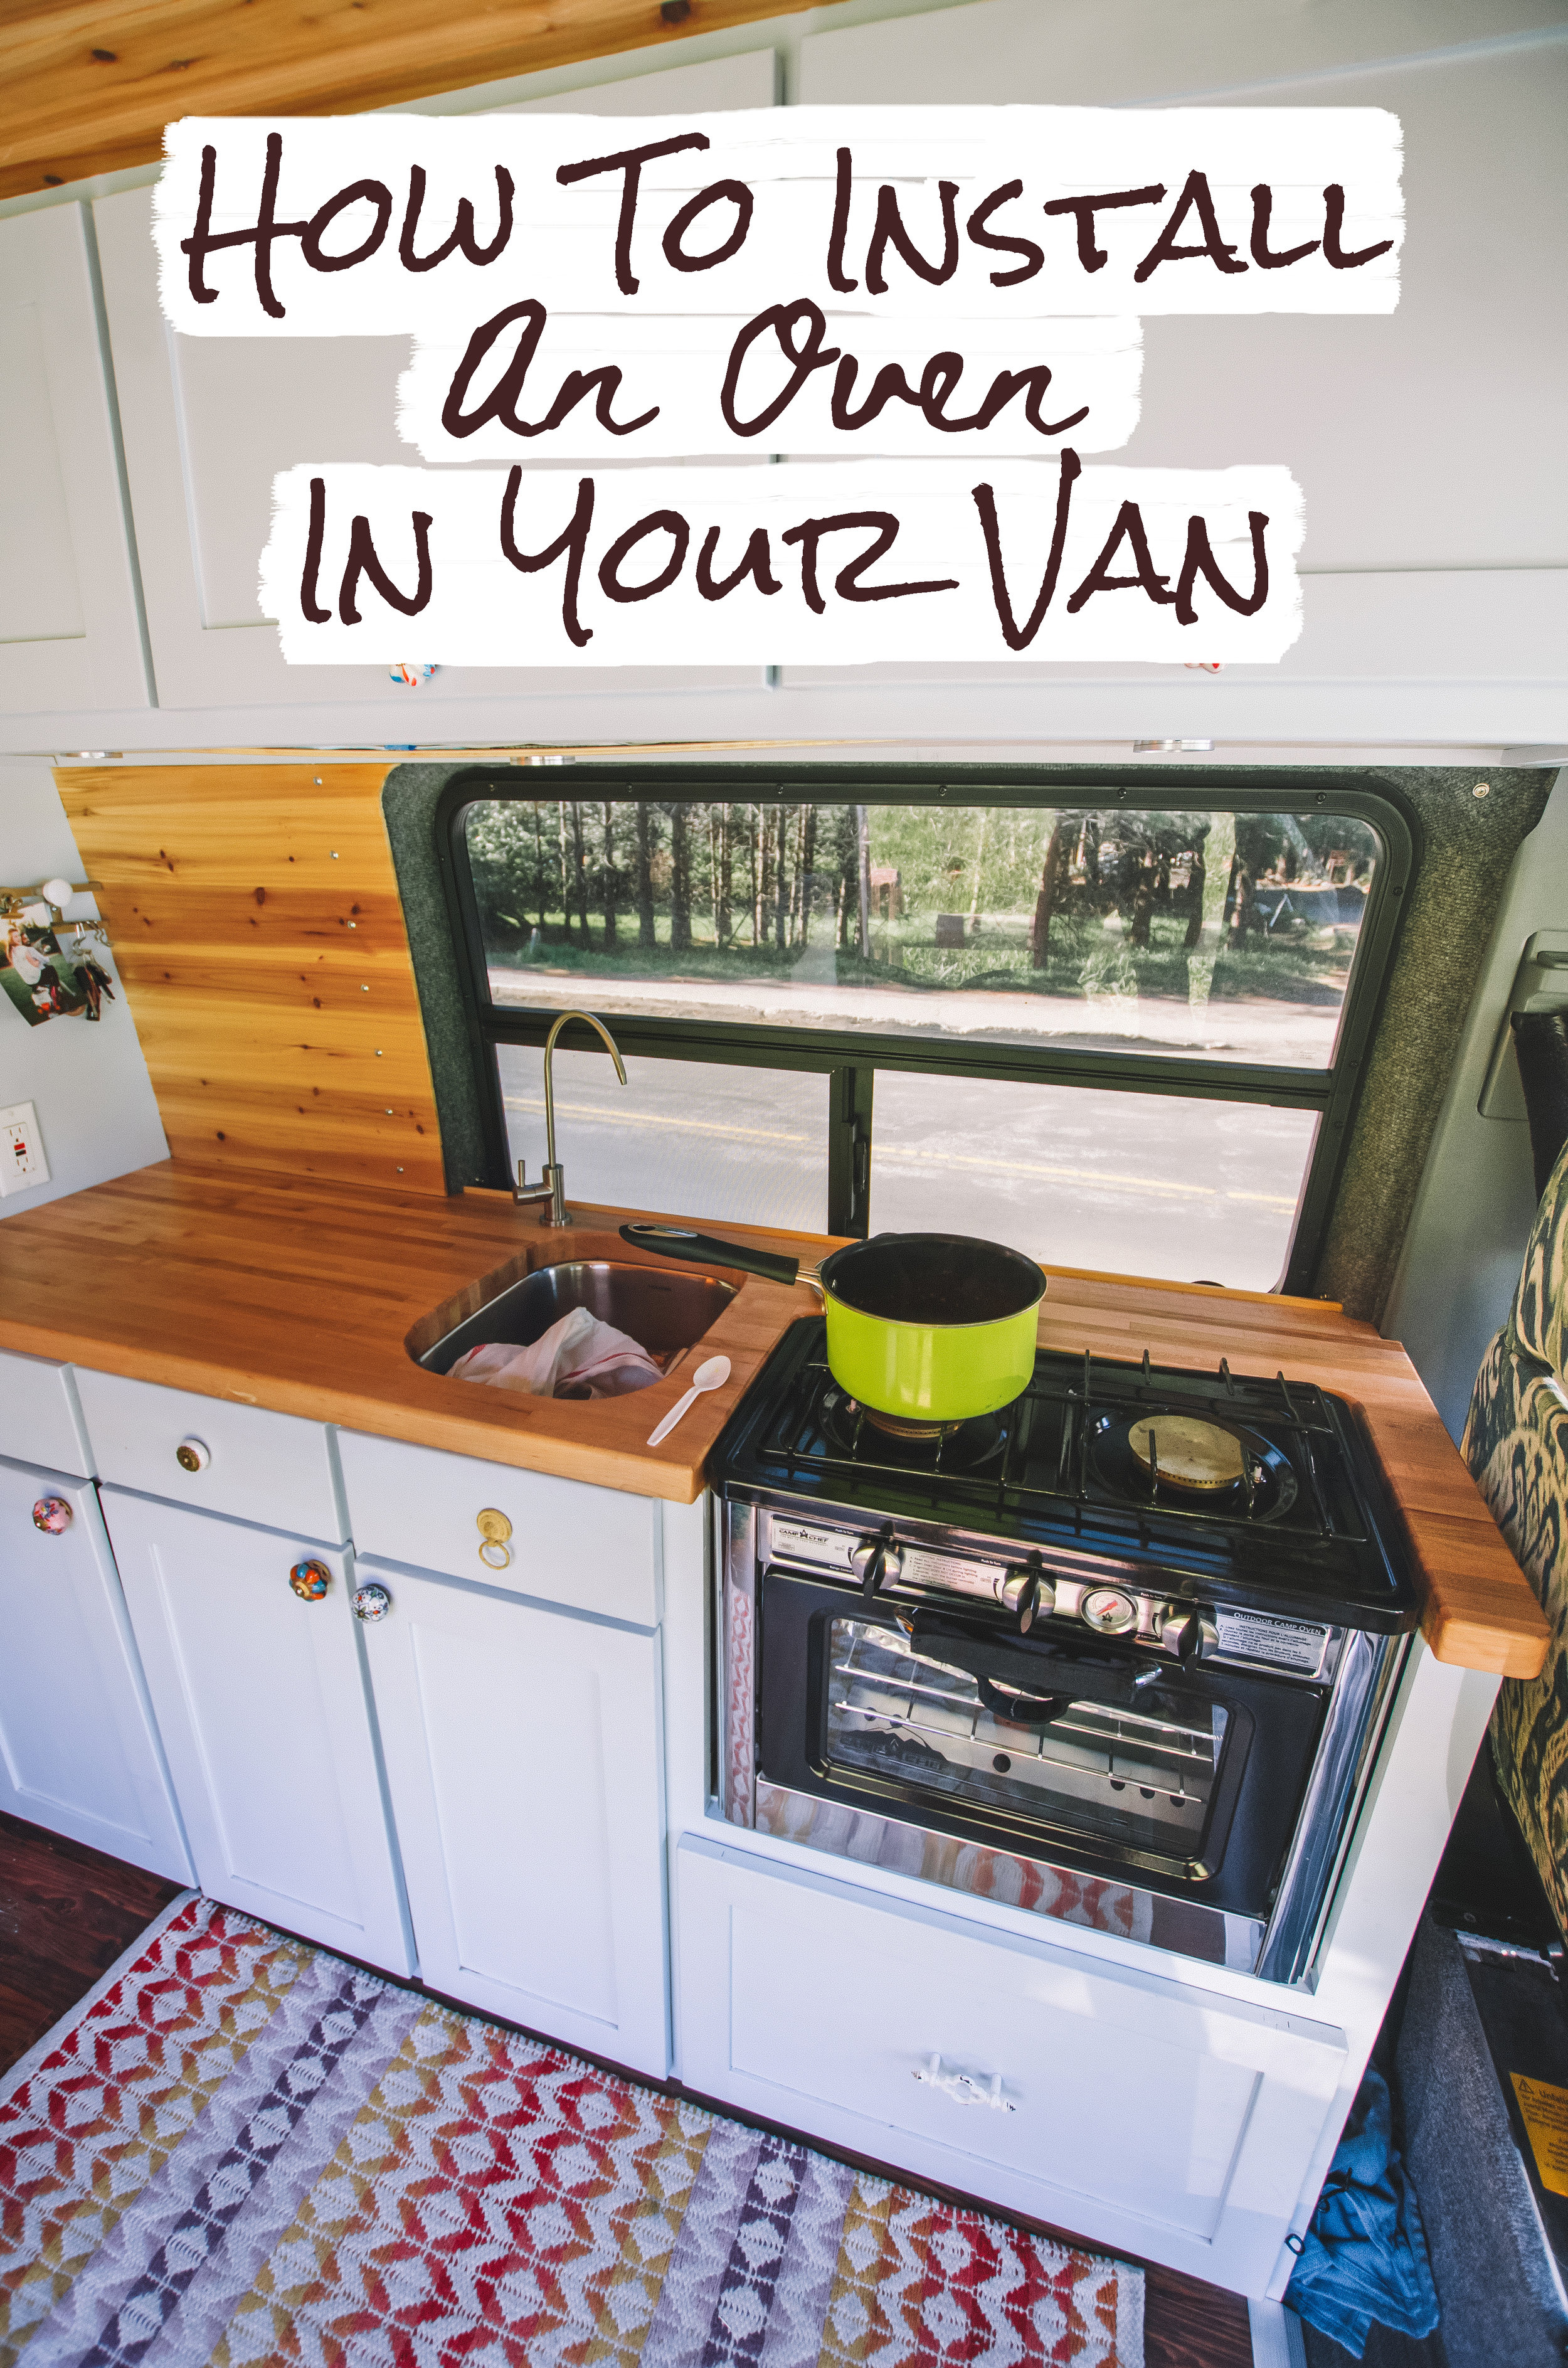
If you follow us on Instagram, you've seen that we have an oven and a range in our Sprinter. We agonized over whether to include the oven, because we knew that safely installing an oven in a van would come with a number of challenges. At first we thought we'd get an oven from an RV, so started calling RV junk yards and browsing around online, only to find that folks charge a pretty penny for RV ovens. After some more research we struck upon the Outdoor Camping Oven from Camp Chef (don't worry, we're not sponsored), which had excellent reviews and an affordable price tag on Amazon. The only problem was that as the name suggests, it's suppose to be an outdoor oven only. However, after chatting with our fathers (a general contractor and an aviation mechanic + safety manager with a background in construction) we became convinced that it could be installed safely with their assistance and went ahead with the purchase. For part of the build, we took the Sprinter to New Mexico and during that time, my father installed the oven. I didn't think people would think much of it, but we've received a lot of questions about the oven, some of which I haven't had the answers to. As such, I asked my father to provide some details about the install and the following is what he sent me:
Installing the oven had inherent challenges because this stove is not designed for indoor use, and vents heat from the sides and at the top back area. Folks need to stay safe!
Mitigations include:
1) Allowing a couple inches of airspace all around (point out that the countertop was relieved underneath to allow hot air to vent up the back and out the van side window, and that front cabinet trim covers the side airspace gaps so they aren't readily seen. Maybe show some install pics where you can see before the trim was put on).
2) Lining the stove box with Hardie Backer Cement Board (Home Depot) as a fire barrier (sides and back spaced out 1/2 inch from the wood with washers made from rubber fuel hose (autozone) and attached wood screws).
3) Using Thermo-Tec 14130 (amazon) Reflective Flame barrier applied to cement board with high temp spray adhesive, and joints sealed with aluminum tape. (Resists heat up to 1,500 degrees, and is necessary because cement board will transfer heat even though it won't burn, and used alone would allow heat to transfer through to the wood cabinet which is what you're trying to avoid).
4) Securing LP gas bottle in a properly vented and sealed location well removed from stove area. (reference LP gas bottle rules for boats and RV's as a safety guide)
5) Fire extinguisher readily available
So in summary, the rigid cement board allows for airspace between it and the wood cabinet and is non-combustable, while the Thermo-Tec reflective barrier keeps heat from going through. And all the heat must be safely allowed to vent up and out somewhere.
Additional install challenge was how to secure it. It sits on its original rubber feet, but holes were drilled in the cement board to allow the feet to sit directly on the wood shelf. Replaced original screws that were in the pre-drilled holes in the bottoms of the feet with long ones (Lowes) that go through the shelf it sits on. So, long screws threaded from the underside of the shelf into the bottoms of the original feet hold it down, and the holes through the cement board also keep it from sliding around. The side handles were removed from the stove to accommodate installation.
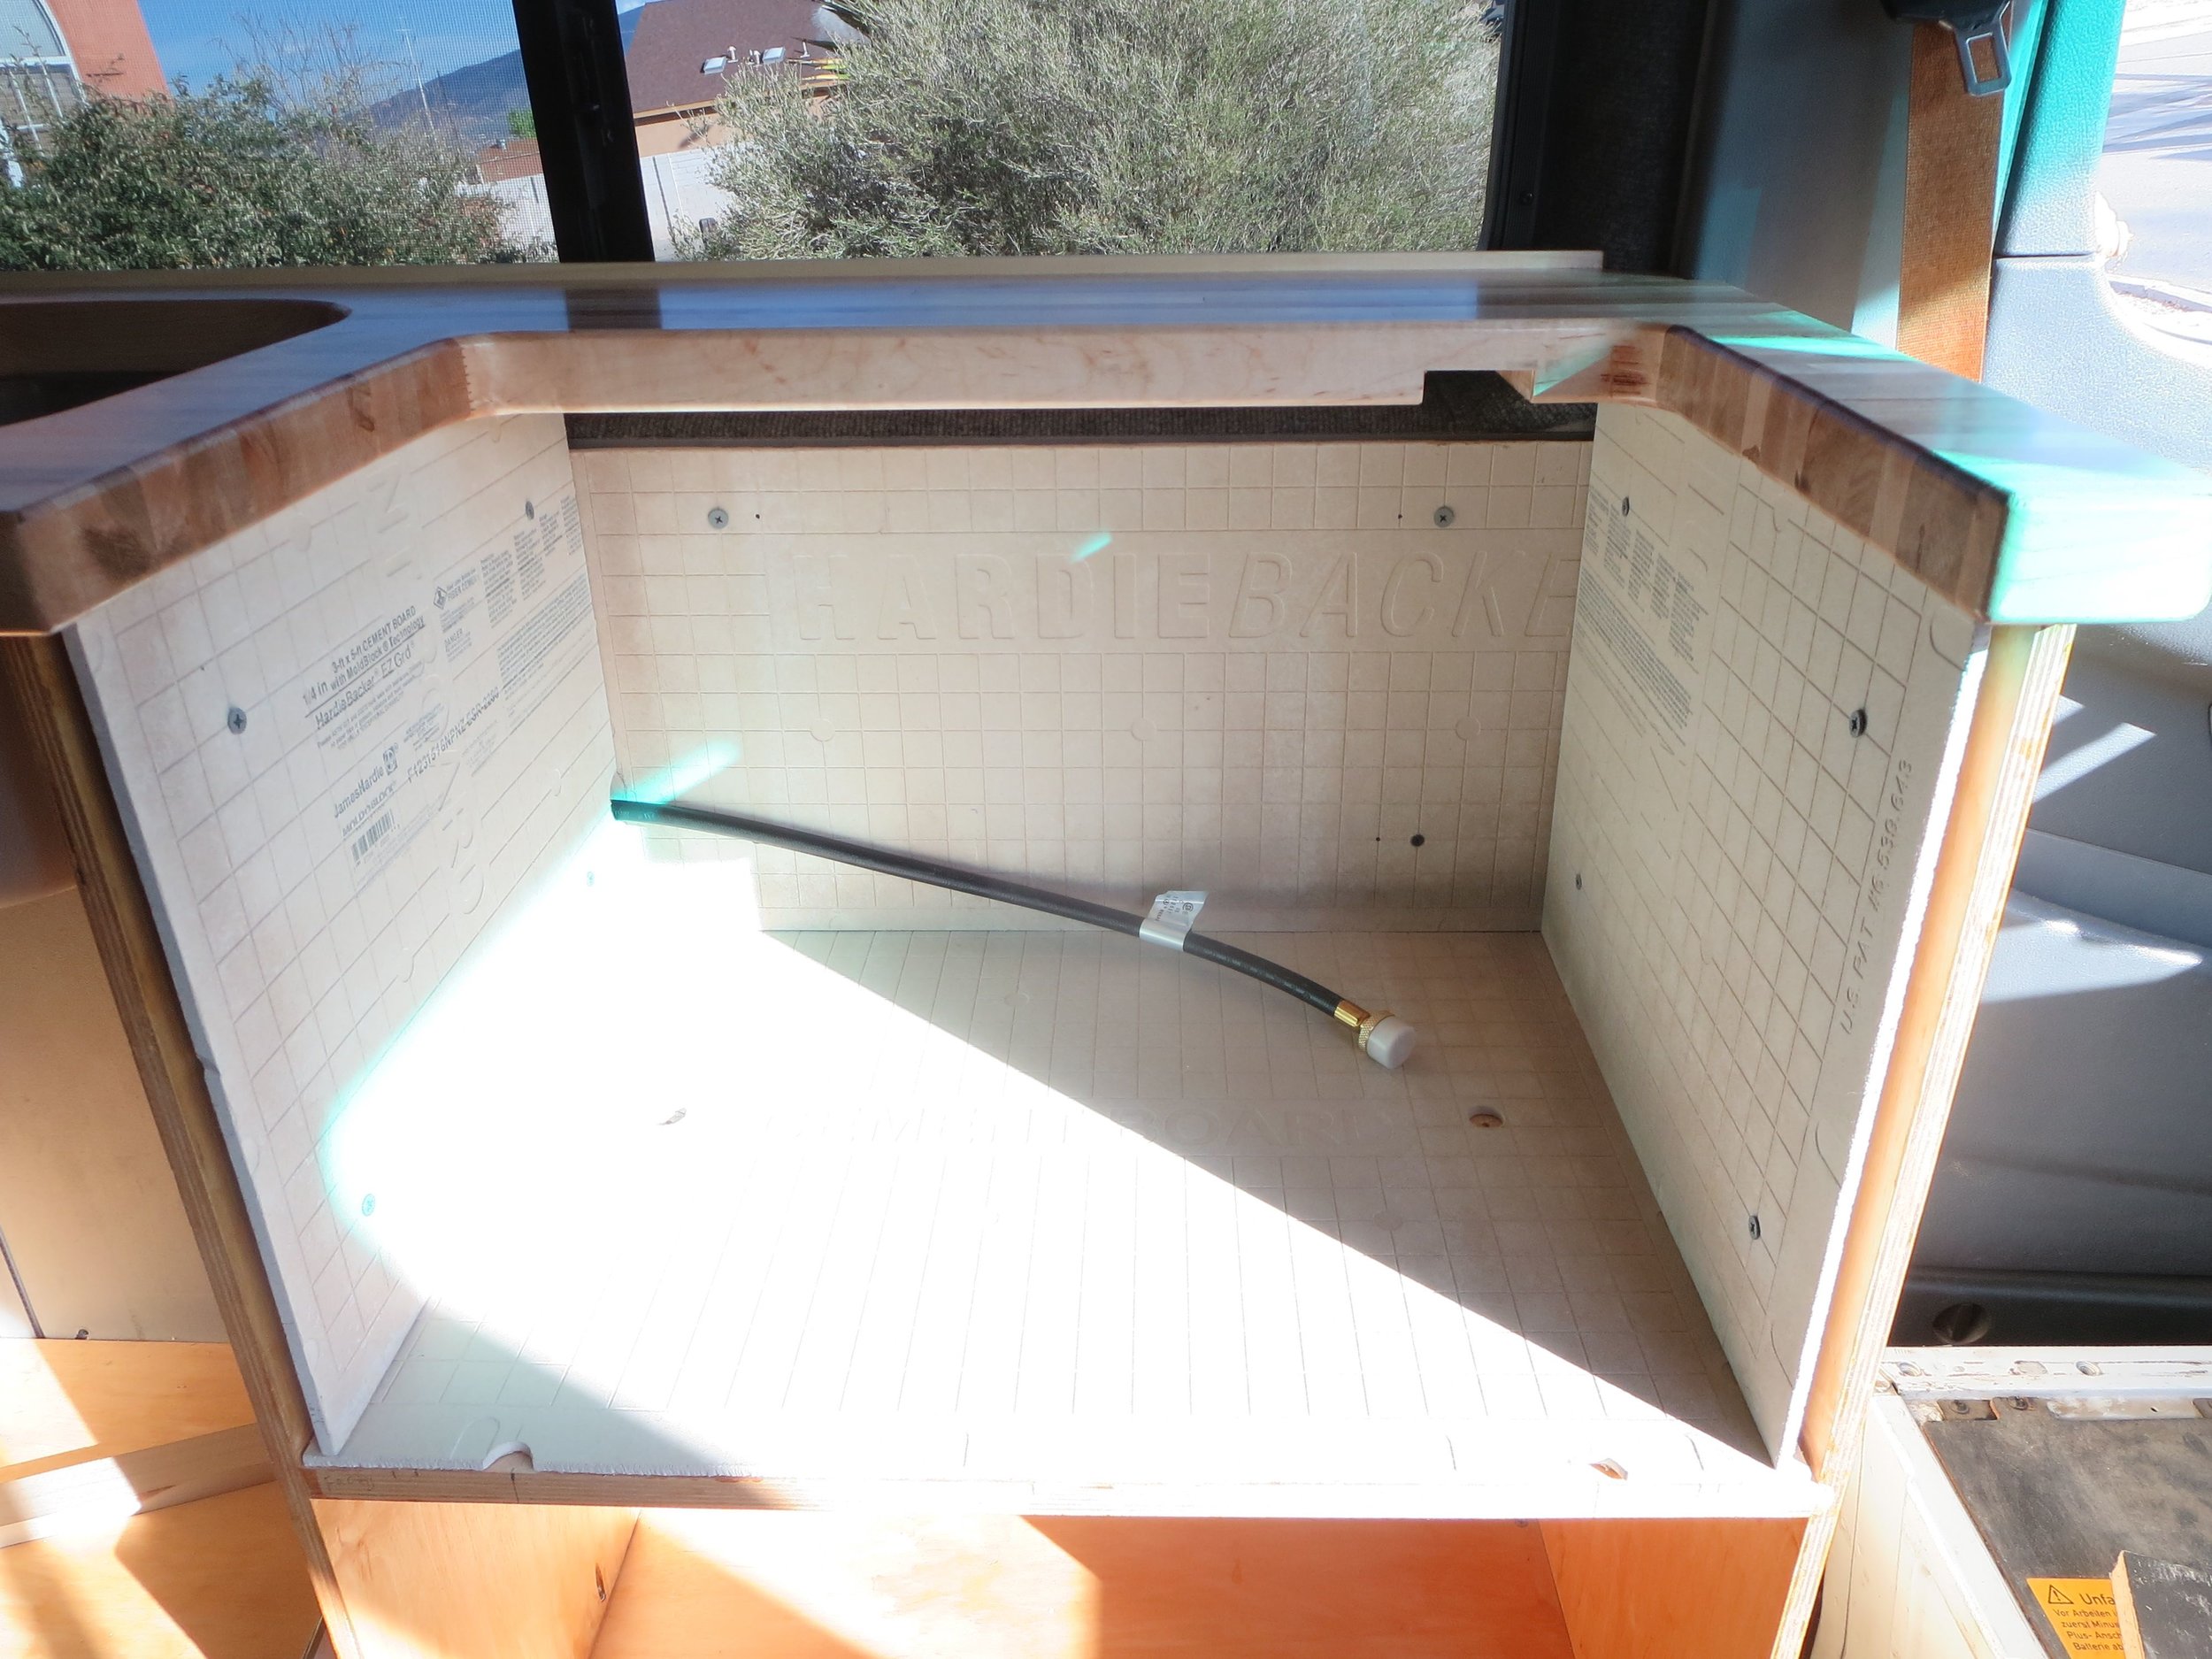
Hardie Board layer
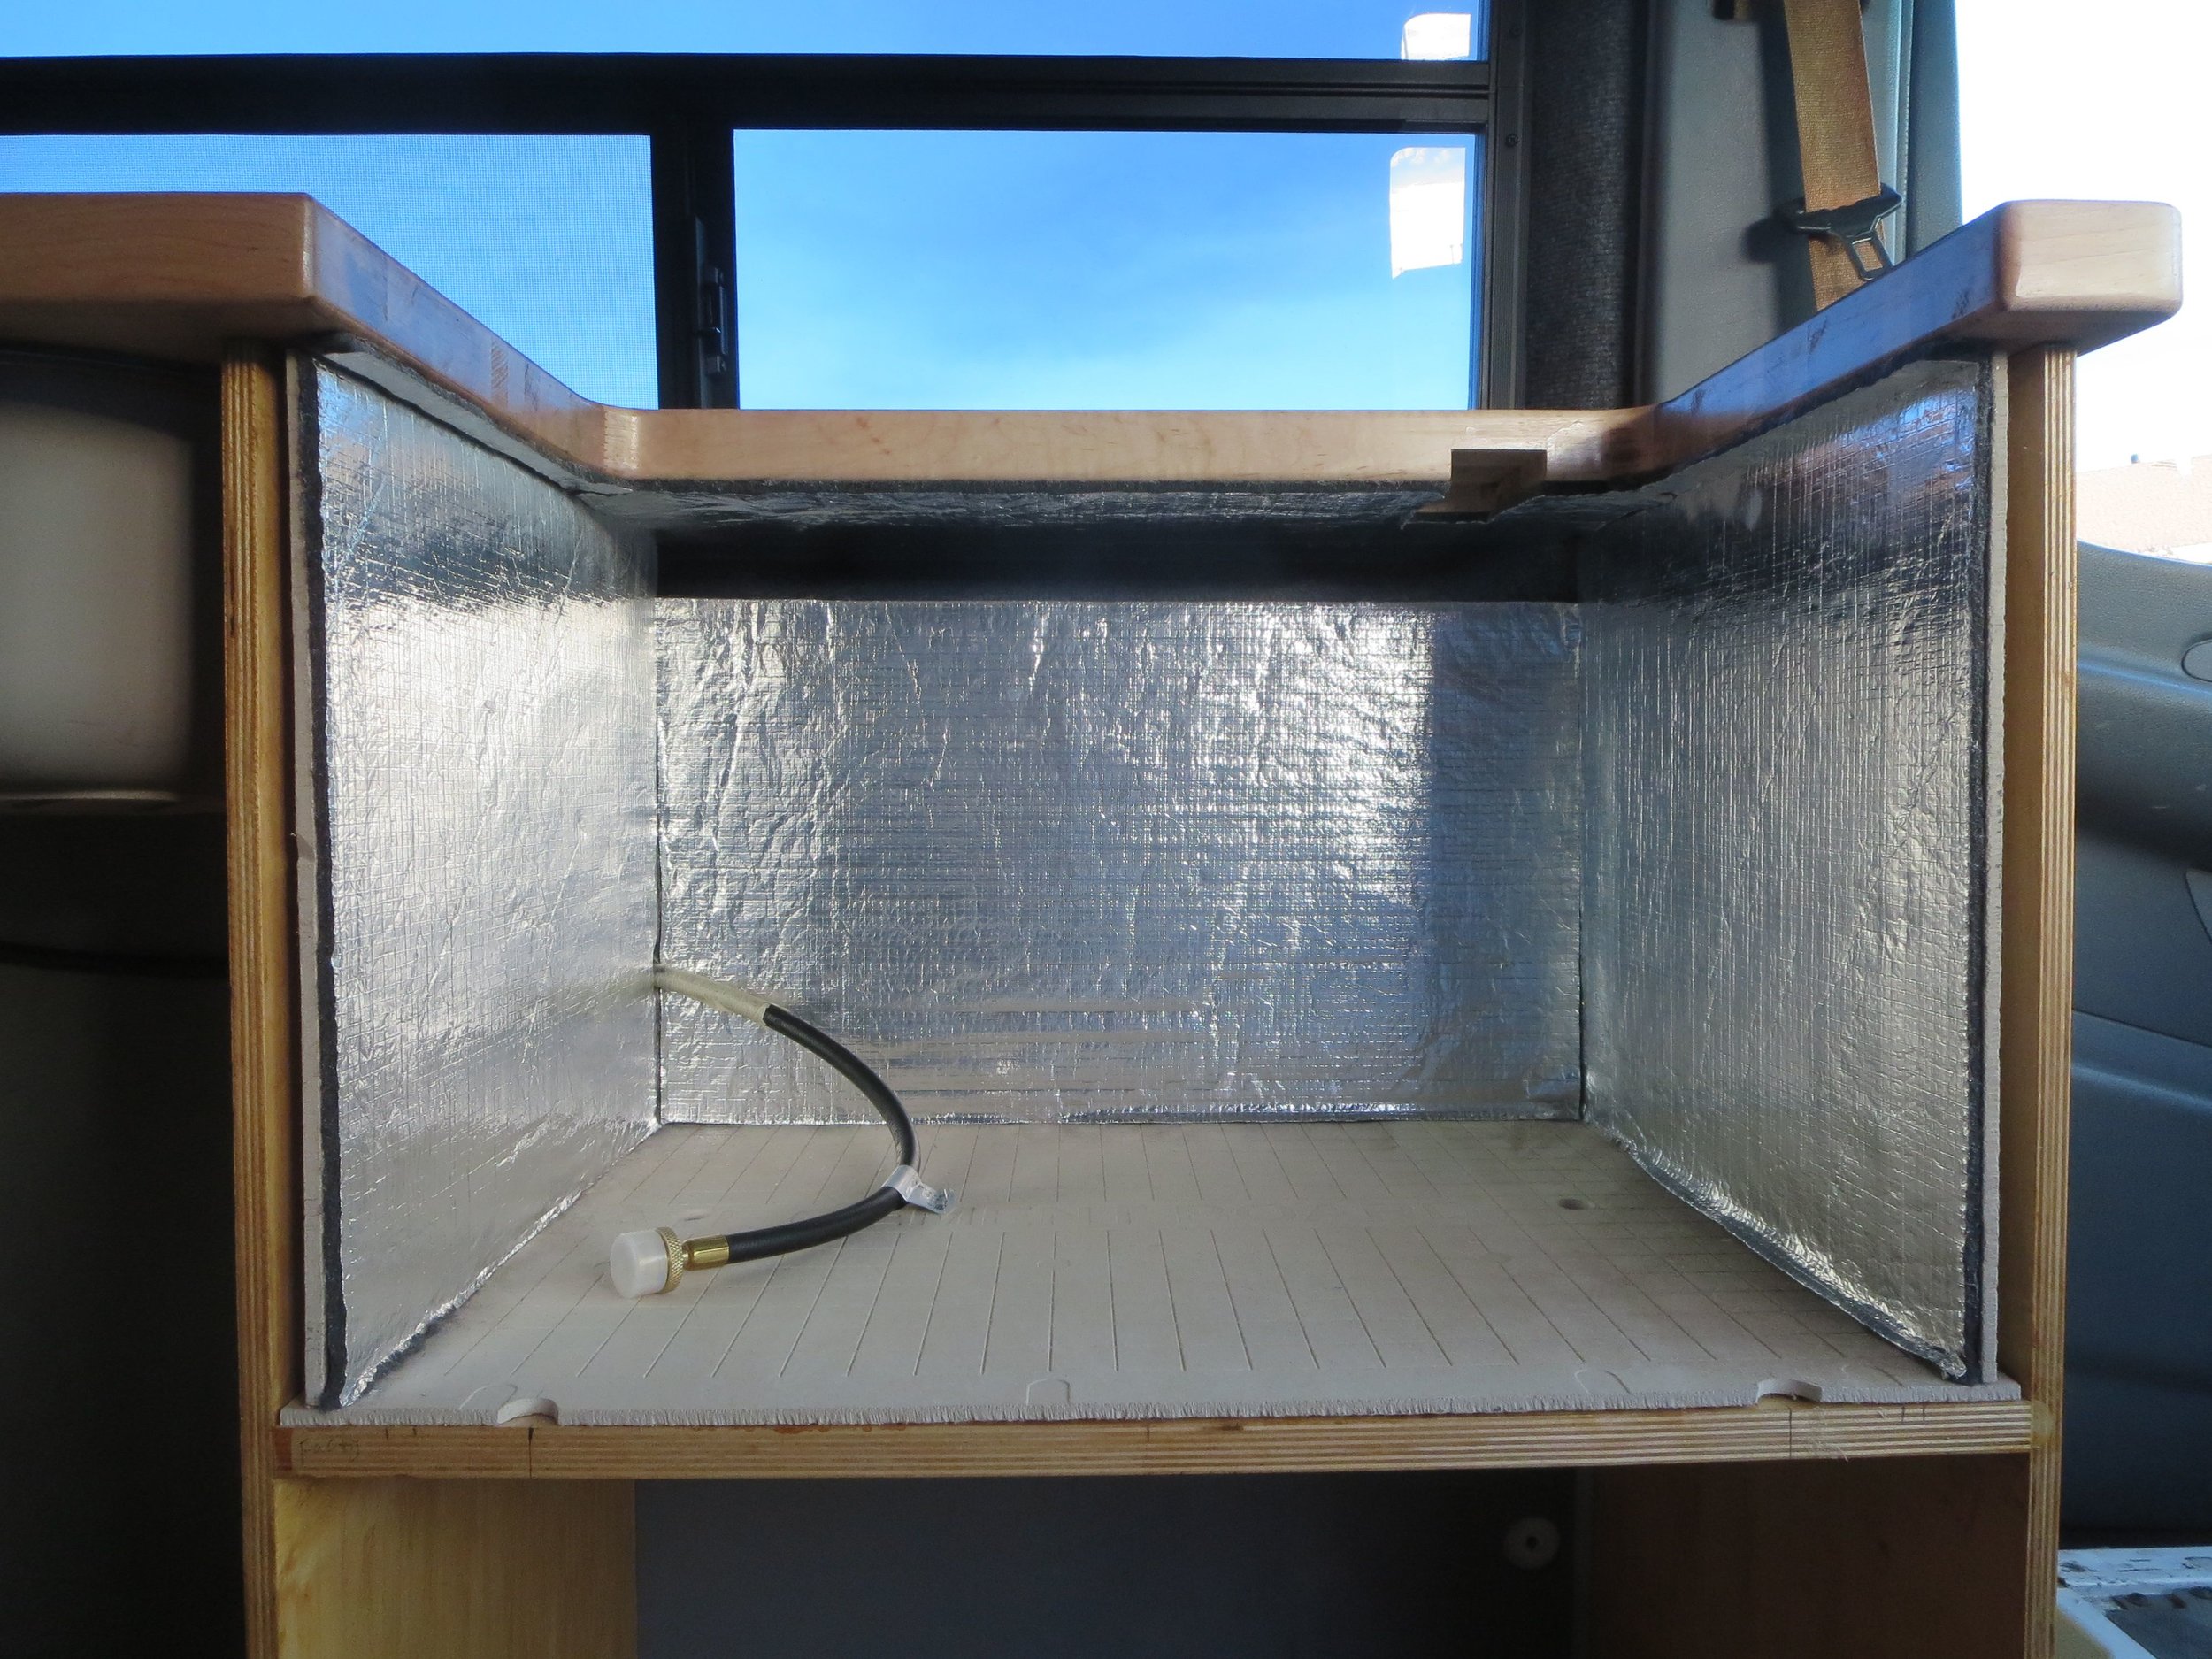
Thermo-Tech layer

A good view of all four layers: plywood, airspace, Hardie Board, and Thermo-Tech

Rubber stoppers between the plywood and Hardie Board
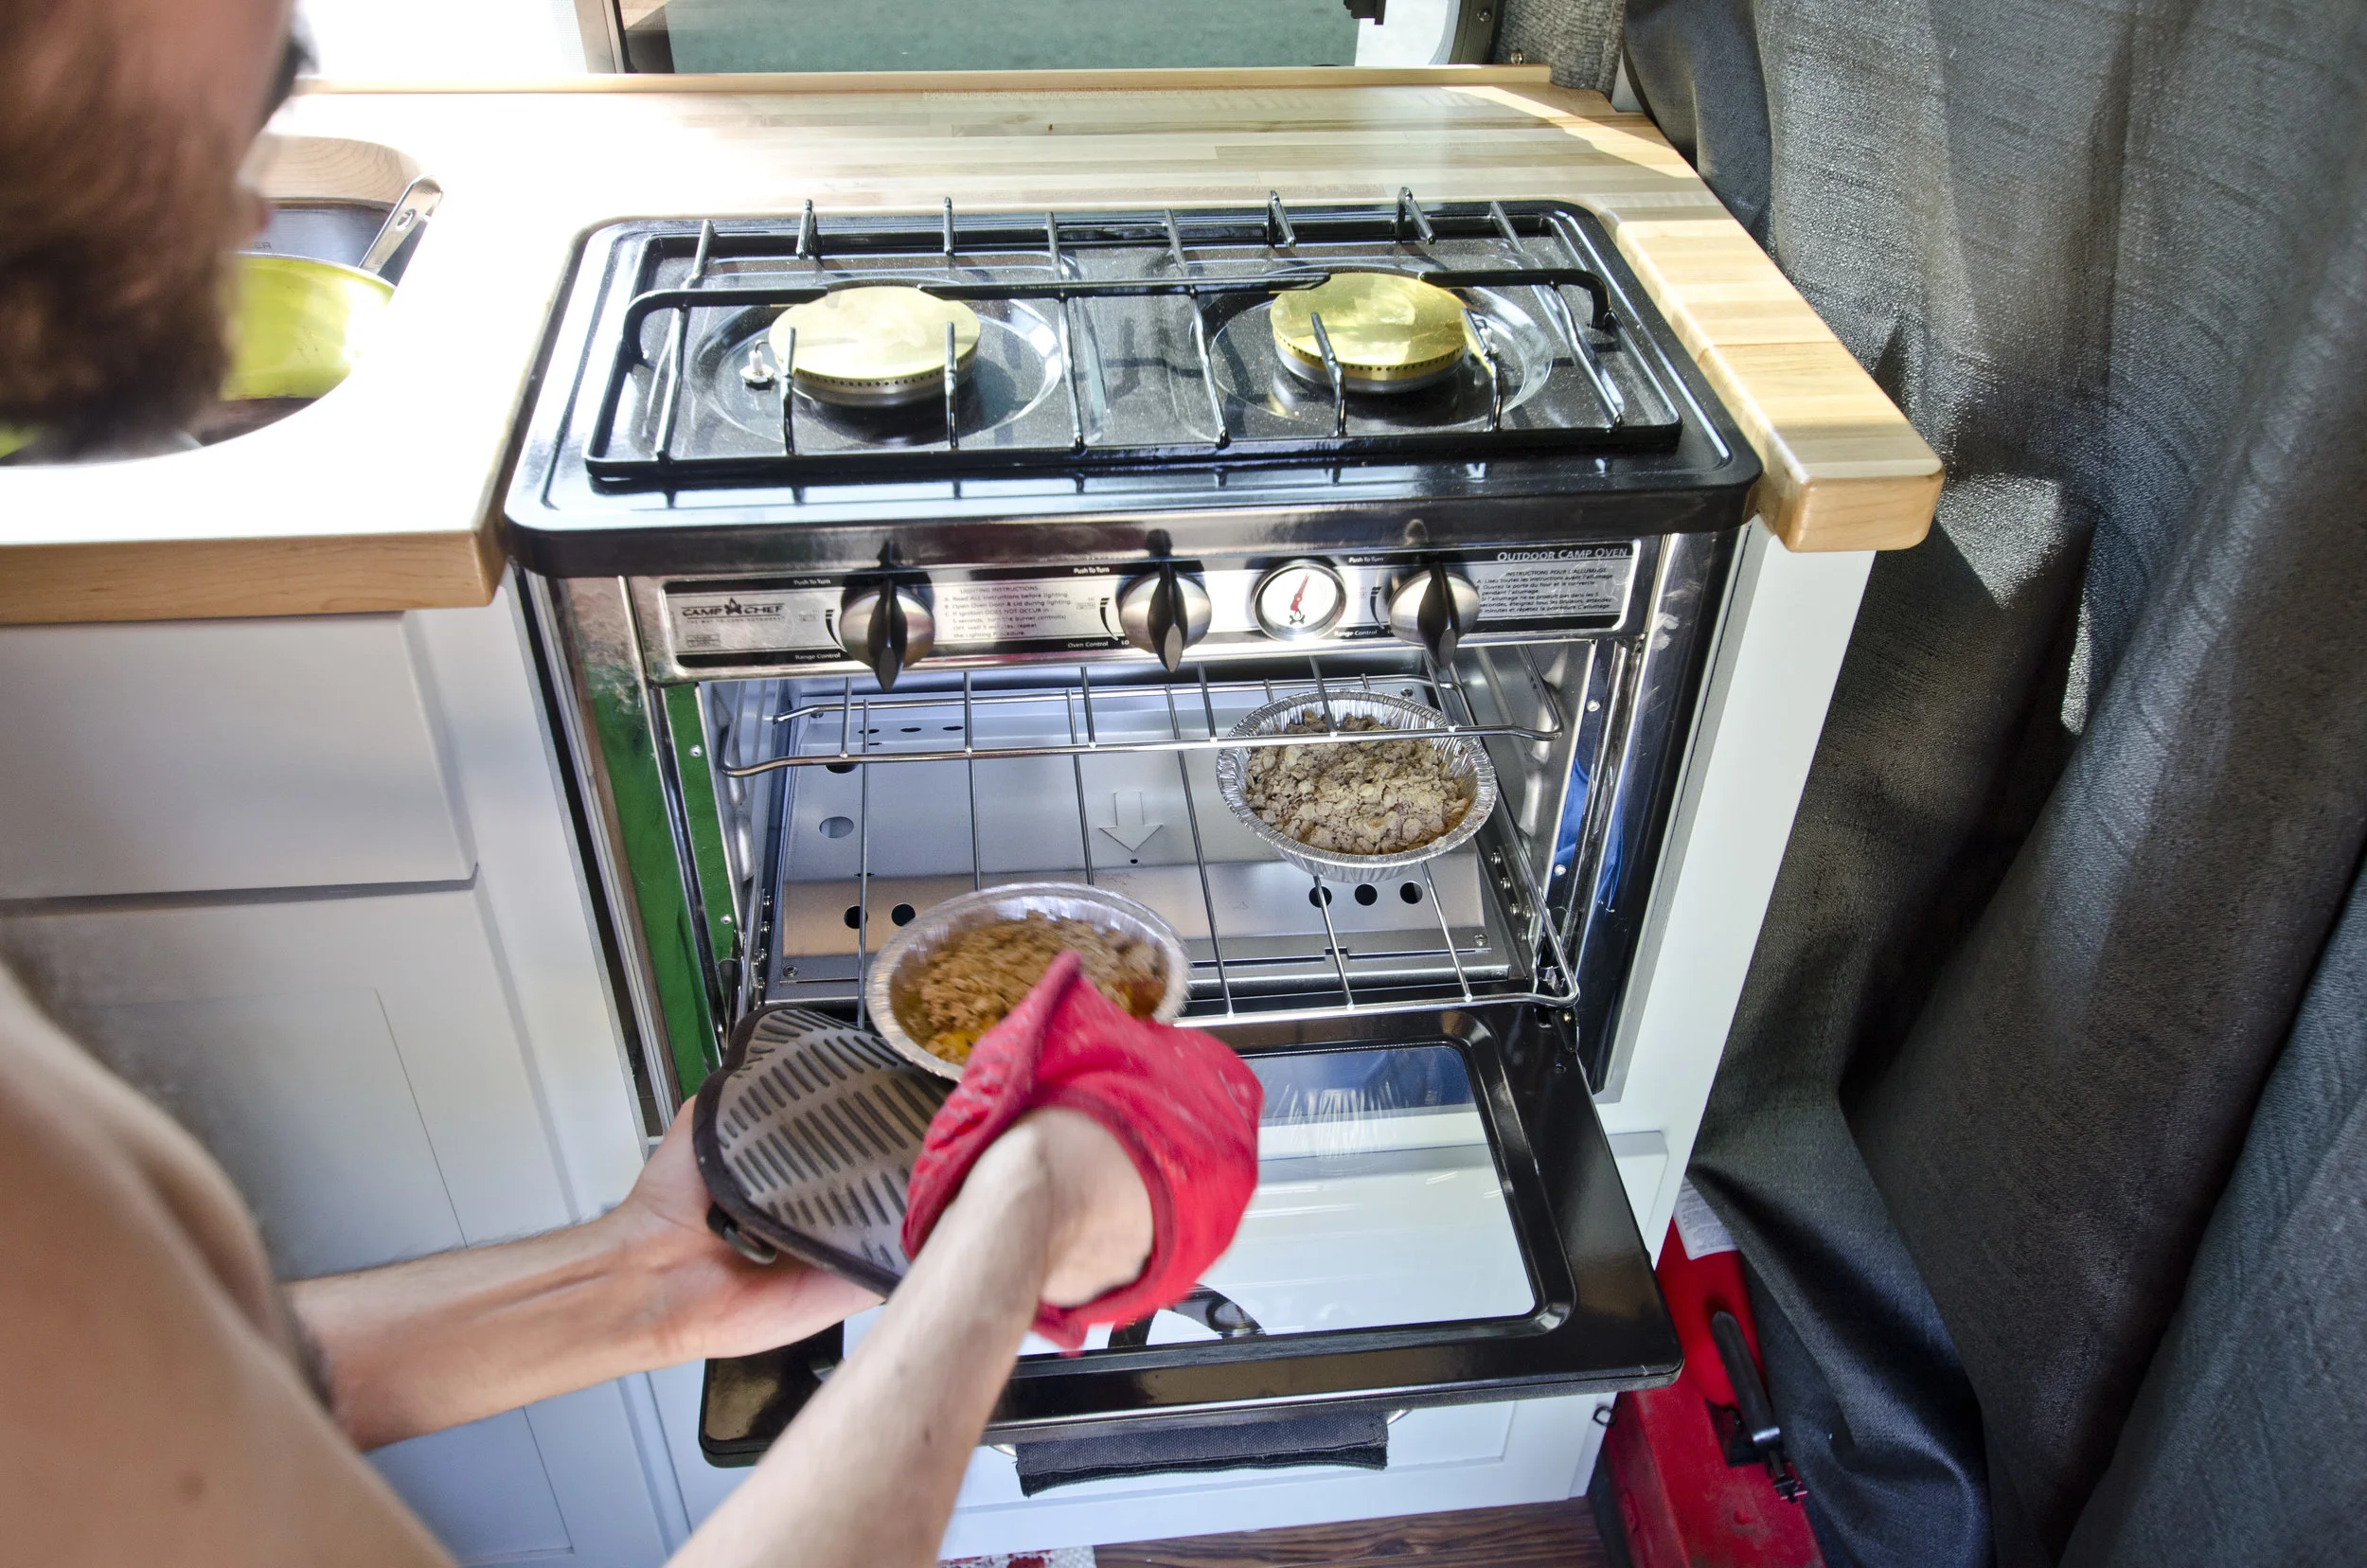
The finished product and some apple cobbler
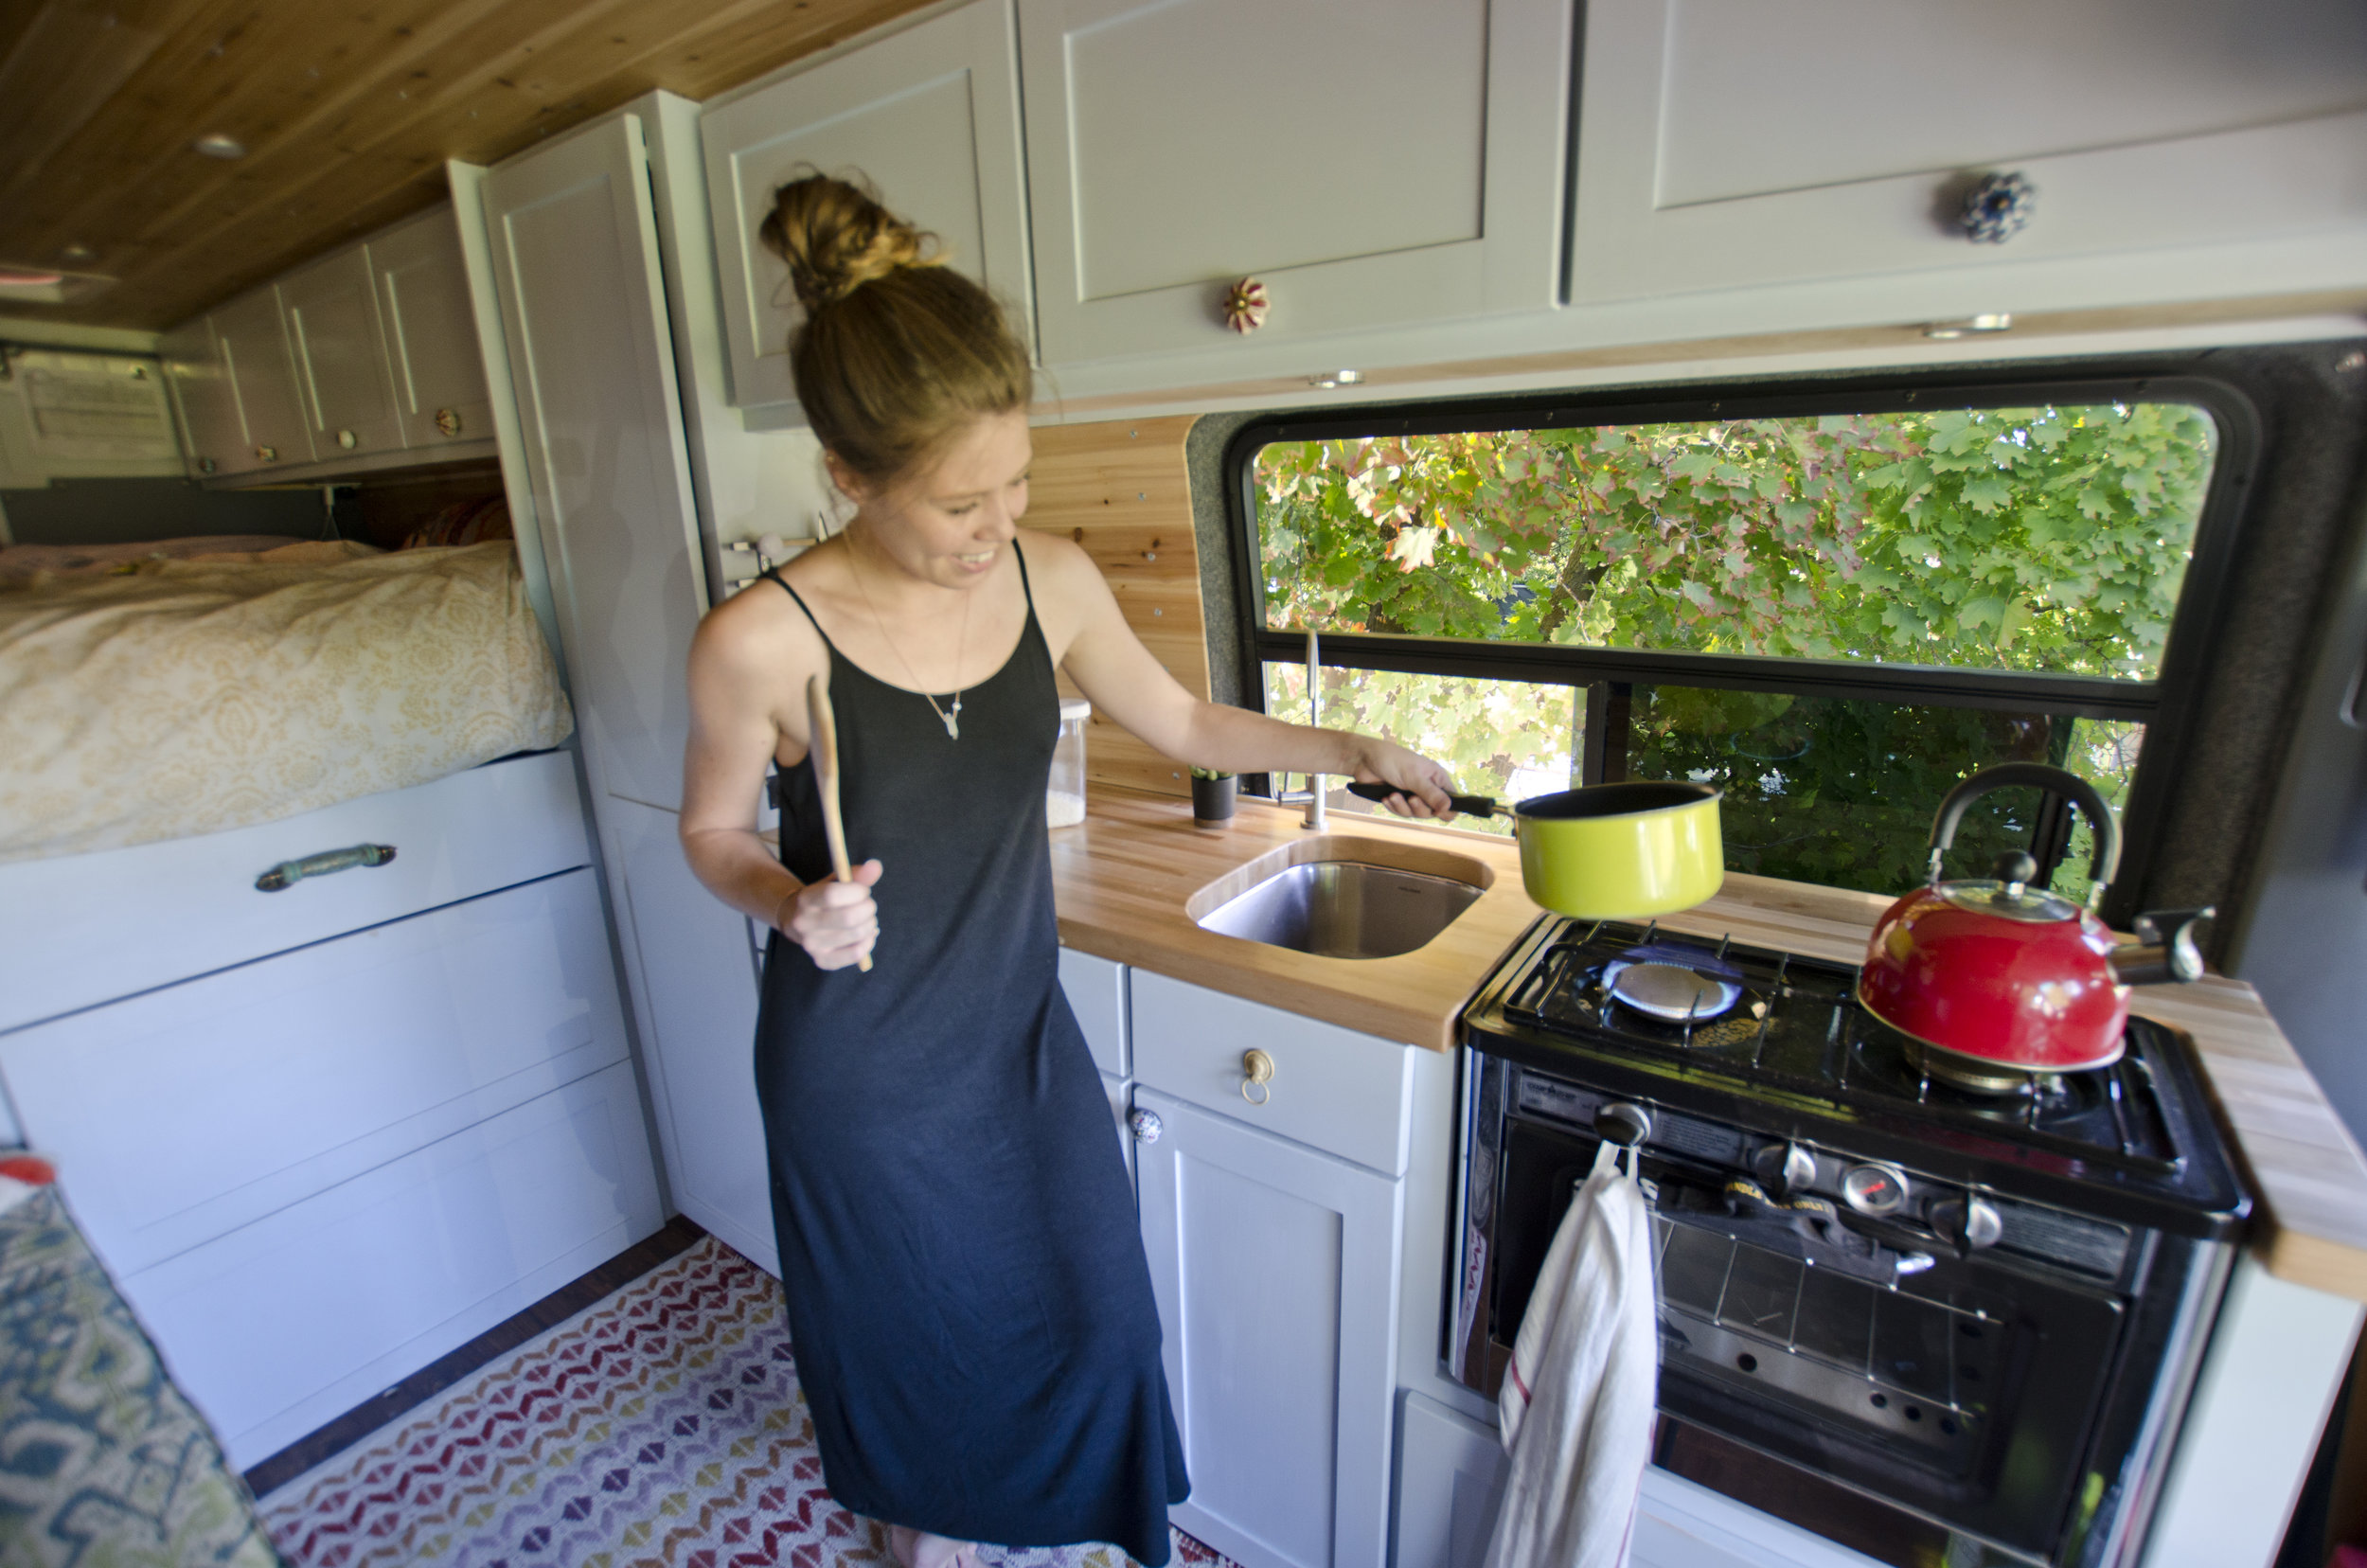
I hope that's helpful to ya'll who are considering adding an oven to your van build. Feel free to leave comments or send us a message if you have further questions and we'll do our best to answer them! We've used the oven a number of times since moving in and I'm happy to say that it's worked beautifully with almost no heat transfer to the surrounding counter.